Moving a Carport A Step-by-Step Guide
Moving a carport might sound daunting, but with the right plan, it’s manageable. This guide breaks down the entire process, from assessing your carport’s type and suitability for relocation to the final reassembly. We’ll cover everything from safe disassembly techniques and transportation methods to necessary permits and cost estimations. Get ready to roll up your sleeves and tackle this project with confidence!
We’ll explore the different types of carports – metal, wood, and fabric – detailing their unique characteristics and how these impact the moving process. You’ll learn how to safely disassemble each type, choosing the best transportation method for your specific carport, and then reassembling it in your new location. We’ll also address crucial safety precautions and necessary permits to ensure a smooth and legal relocation.
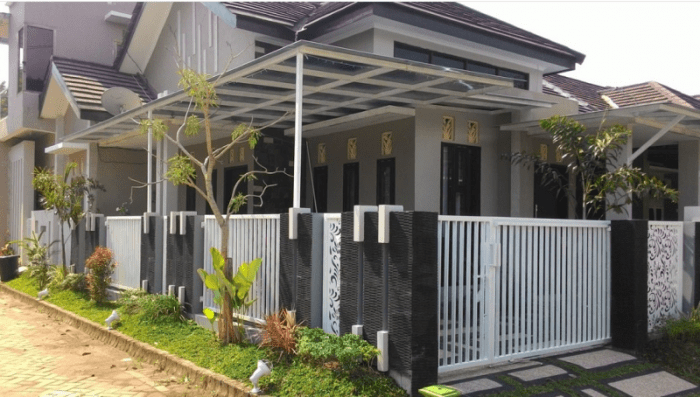
Types of Carports and Suitability for Moving

Source: persadaland.com
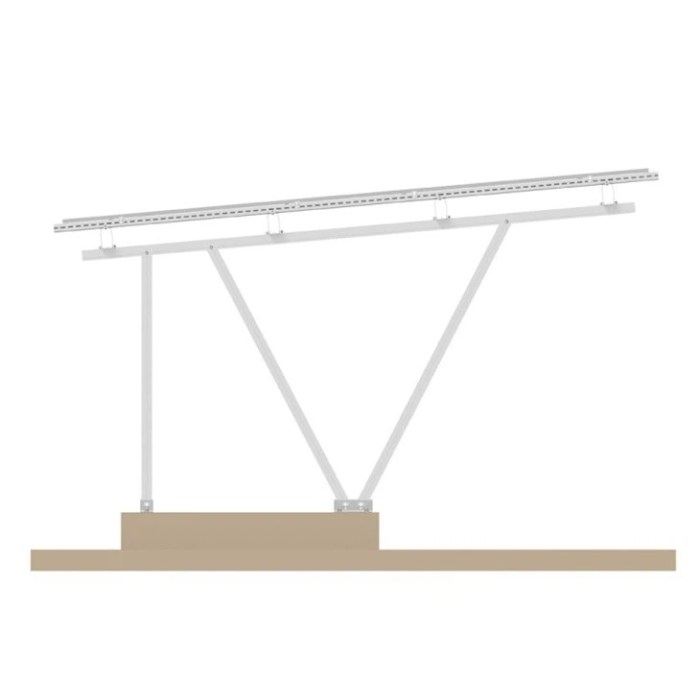
Moving a carport is a significant undertaking, and the feasibility depends heavily on the type of carport you have. Different materials and construction methods result in varying weights, dimensions, and ease of disassembly and reassembly. Understanding these factors is crucial for planning a successful move.
Metal Carports
Metal carports are generally the most common type. They’re typically constructed from galvanized steel or aluminum framing, often with a metal roof. The weight varies considerably depending on the size and gauge of the metal used, ranging from a few hundred pounds for smaller models to several thousand pounds for larger structures. Dimensions also vary widely, from single-car to multi-car designs and various lengths. Structurally, these carports consist of a framework of posts, beams, and rafters, often bolted together. Disassembly involves carefully removing the bolts and separating the components. Reassembly requires precise alignment and secure fastening. Metal carports are generally easier to move than wood carports due to their relative ease of disassembly and the durability of the materials. A small, single-car metal carport might be manageable with a strong team and appropriate tools, while larger structures will require heavy equipment like a crane or specialized trailer.
Wooden Carports
Wooden carports offer a more aesthetically pleasing option, often blending better with natural surroundings. However, they are generally heavier and more difficult to move than metal carports. Weight can vary greatly based on the type and size of lumber used, ranging from several hundred pounds for small structures to many tons for larger ones. Dimensions are similarly variable, dependent on the owner’s needs. Structurally, wooden carports typically utilize posts, beams, rafters, and sheathing, often connected with nails, screws, and possibly bolts. Disassembly requires careful removal of these fasteners, potentially causing damage to the wood. Reassembly necessitates accurate alignment and secure refastening. The weight and the potential for damage during disassembly make moving a wooden carport a much more complex undertaking, often requiring professional help and specialized equipment.
Fabric Carports
Fabric carports, often made from canvas or similar materials, supported by a metal or wood frame, represent a lightweight and portable option. Their weight is significantly less than metal or wood carports, typically ranging from tens to a few hundred pounds, depending on size and material. Dimensions are generally smaller than metal or wood carports, often suitable for a single vehicle. Structurally, these carports are relatively simple, consisting of a frame and a fabric cover. Disassembly is usually straightforward, involving detaching the fabric cover and dismantling the frame. Reassembly is similarly easy. Because of their light weight and ease of disassembly, fabric carports are the easiest type to move, often manageable with a small team and a standard truck or trailer.
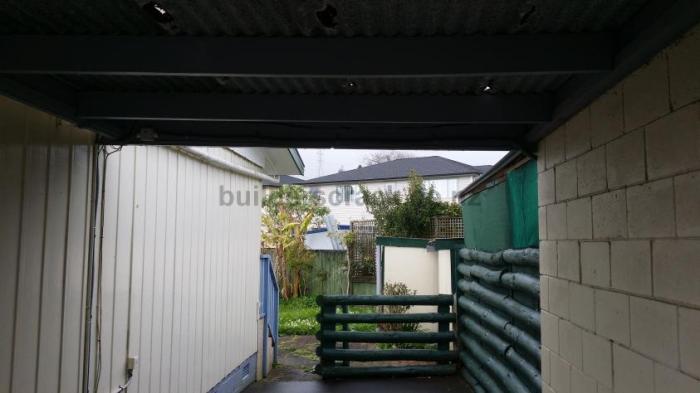
Disassembly Procedures

Source: Squarespace-cdn.com
Taking down a carport, whether it’s made of metal, wood, or fabric, requires careful planning and execution. Proper disassembly ensures the structure’s components remain usable for reassembly at the new location and minimizes the risk of injury. Remember to always prioritize safety and use appropriate personal protective equipment (PPE).
Metal Carport Disassembly
Disassembling a metal carport involves several steps, requiring specific tools and safety precautions. Begin by disconnecting any electrical components or attachments, like lighting or fans, and ensuring the power is completely switched off. Then, carefully remove any roofing material, starting from the highest point and working your way down. This prevents accidental damage to lower sections. Finally, dismantle the frame, removing bolts and connectors one by one, paying close attention to the order of removal to aid reassembly.
Wooden Carport Disassembly
Disassembling a wooden carport is a more delicate process than metal. Thorough labeling of each component is crucial for successful reassembly. Before starting, take detailed photographs of the structure from various angles, noting the location and orientation of each piece. Then, begin dismantling, starting from the roof and working your way down. Number and label every component and its corresponding location. Keep screws and fasteners organized in labeled bags. This careful approach is essential for minimizing the risk of confusion and damage during reassembly.
Fabric Carport Disassembly
Fabric carports are generally the easiest to disassemble. However, care must be taken to avoid tearing the fabric. Start by removing any securing straps or clips that hold the fabric to the frame. Then, carefully fold the fabric, starting from one end and rolling it neatly. Protect the folded fabric with a tarp or other covering to avoid damage during transportation. Finally, dismantle the frame, again paying attention to the order of removal.
| Step Number | Action | Tools Needed | Safety Precautions |
|---|---|---|---|
| 1 | Disconnect electrical components (if applicable) | Screwdriver, pliers | Turn off the power completely. |
| 2 | Remove roofing material | Gloves, ladder (if needed) | Wear appropriate safety gear; use caution on ladders. |
| 3 | Dismantle frame (metal) | Wrench, socket set, bolt cutters (if needed) | Wear gloves; use caution with sharp edges. |
| 4 | Label and organize parts (wooden) | Numbering system, labels, bags | Take detailed photos for reference. |
| 5 | Remove securing straps/clips (fabric) | Screwdriver, pliers | Avoid tearing the fabric. |
| 6 | Fold and protect fabric (fabric) | Tarp or cover | Handle carefully to avoid damage. |
| 7 | Dismantle frame (wooden/fabric) | Screwdriver, hammer, pry bar (if needed) | Use caution with sharp edges and heavy components. |
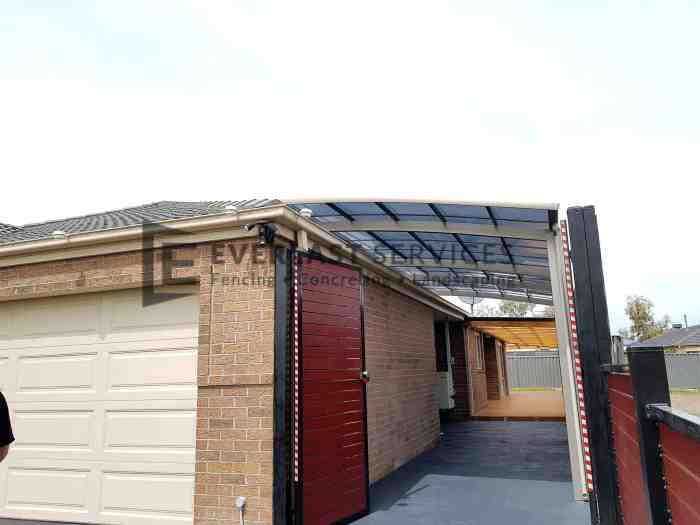
Transportation Methods: Moving A Carport
Source: ourdownsizedlife.com
Getting your disassembled carport to its new location requires careful planning and the right transportation method. The best choice depends heavily on the carport’s size, weight, and the distance you need to cover. Larger carports will naturally require more substantial transportation options.
Choosing the right transportation method is crucial to prevent damage and ensure a smooth move. Factors like the type of road you’ll be traveling on and the availability of suitable vehicles also play a significant role in your decision.
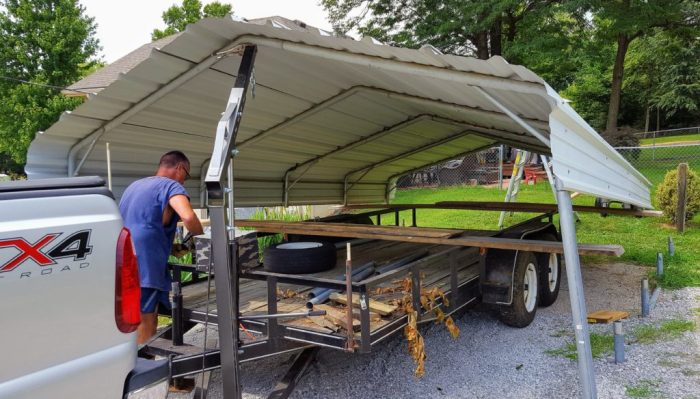
Trailer Selection and Usage, Moving a Carport
Trailers offer a versatile and often cost-effective solution for transporting disassembled carport components. Smaller carports, especially those made of lightweight materials like aluminum, can be easily accommodated on a standard utility trailer. Larger carports, however, might necessitate a heavier-duty trailer with a higher weight capacity. Ensure the trailer’s dimensions are sufficient to accommodate the longest carport piece. Remember to check your vehicle’s towing capacity before selecting a trailer. For instance, a small, lightweight carport made of PVC could be transported on a standard 5×8 utility trailer towed by a mid-size SUV. However, a large metal carport might require a 16ft or larger trailer and a truck capable of towing a significant weight.
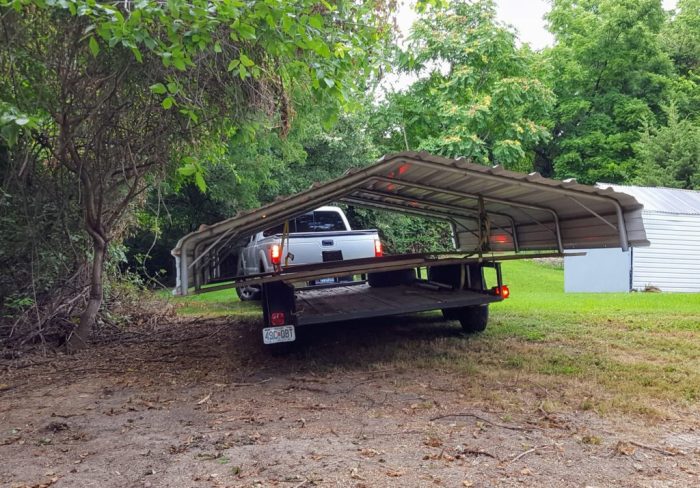
Truck and Van Transportation
For smaller carports and shorter distances, a pickup truck or a large van might be sufficient. This method can be more convenient than using a trailer, especially for managing smaller, lighter pieces. However, larger carports will likely exceed the carrying capacity of even the largest vans. A pickup truck, while potentially suitable for smaller projects, might require careful load distribution to avoid imbalance and potential damage. Consider the dimensions of your truck bed or van to ensure you can fit all the carport components.
Cost Comparison
The cost of transportation varies significantly. Renting a trailer typically ranges from $30 to $100 per day, depending on size and location. Fuel costs for towing will also need to be factored in. Using your truck or van eliminates rental fees but might involve higher fuel consumption if it’s a less fuel-efficient vehicle. For larger carports, hiring a specialized transport company might be the most practical and potentially safest option, although this is typically the most expensive choice.
Securing the Carport During Transport
Properly securing the disassembled carport is paramount to prevent damage during transportation. Use strong ropes, straps, or ratchet straps to firmly fasten all components to the trailer or truck bed. Ensure that the load is evenly distributed to maintain balance and prevent shifting. Padding, such as blankets or cardboard, can help protect the carport parts from scratches and impacts. Avoid overcrowding the trailer; allow sufficient space between pieces to prevent rubbing and damage. For extra security, consider using additional supports to prevent the load from shifting or falling.
Optimal Loading of a Disassembled Carport onto a Trailer
Consider this text-based representation of loading a carport onto a trailer. Assume a rectangular trailer.
“`
+—————–+
| |
| Carport Frame | <– Heaviest and longest pieces placed first, centered for balance.
| (Long) |
| |
+——–+——–+
| | |
| Side | Side | <– Lighter panels, evenly distributed on either side of the frame.
| Panels | Panels |
| | |
+——–+——–+
| |
| Smaller Parts | <– Smaller components (e.g., connectors, roofing) placed on top, secured tightly.
| |
+—————–+
“`
This illustrates a basic loading strategy. Always prioritize heavier and longer components at the bottom and center for stability. Lighter components should be placed on top, and securely fastened. Remember to always consult the trailer’s weight capacity and secure the load appropriately.
Reassembly Process

Source: persadaland.com
Reassembling your carport after moving it requires careful attention to detail and a methodical approach. The specific steps will vary depending on the type of carport you have – metal, wood, or fabric – but the overall principle remains the same: accurate alignment and secure fastening. Following the reverse order of disassembly is usually the most effective strategy.
Metal Carport Reassembly
Reassembling a metal carport involves carefully aligning and connecting the various pre-fabricated components. Remember to refer to your original assembly instructions if available.
- Base Frame Assembly: Begin by laying out the base frame components on a level surface, ensuring proper alignment. Imagine the frame as a large rectangle, with each component carefully placed. Use measuring tape to double-check the dimensions match the original plan. Secure the connections with bolts and nuts, tightening them evenly to avoid warping.
- Upright Post Installation: Position the upright posts at the corners of the base frame. They should fit snugly into pre-drilled holes or designated slots. Secure them using bolts and nuts, ensuring they are perfectly vertical using a level. Picture this step as carefully placing each post into its position, ensuring a plumb and straight setup.
- Roof Panel Attachment: Once the posts are secure, carefully attach the roof panels. These panels are usually interlocking and should slide or clip easily into place. Start from one end and work your way across, making sure each panel is properly aligned and securely fastened. Think of it as assembling a puzzle, where each panel fits precisely into its assigned spot.
- Additional Supports (if applicable): If your carport has additional supports like bracing or cross-members, attach them now, following the original assembly instructions. These extra components add rigidity and stability to the structure. Visualize these supports acting as additional reinforcement, strengthening the overall carport frame.
Wooden Carport Reassembly
Reassembling a wooden carport demands precision and careful attention to alignment to maintain structural integrity. Pre-drilling pilot holes before screwing in components are highly recommended to prevent splitting the wood.
- Foundation Preparation: Ensure your foundation (concrete piers, etc.) is level and properly spaced. This is crucial for the overall stability of the carport. Imagine this step as preparing a solid base for your house – any misalignment here will affect the whole structure.
- Post Erection: Carefully erect the wooden posts, ensuring they are plumb and firmly anchored to the foundation. Use appropriate fasteners and check for level frequently throughout the process. Visualize the posts as the backbone of your carport, requiring solid and upright positioning.
- Rafter and Beam Installation: Install the rafters and beams, ensuring proper spacing and alignment. Use appropriate fasteners, and pre-drill holes to prevent wood splitting. Think of the rafters and beams as the skeletal system of the roof, requiring accurate placement and secure connection.
- Roofing Material Attachment: Finally, attach the roofing material (e.g., shingles, metal sheets). Follow manufacturer instructions for proper installation. This step provides the protective layer for your carport, sealing it from the elements. Picture this as the final layer of protection, like a coat of armor for the entire structure.
Fabric Carport Reassembly
Reassembling a fabric carport focuses on proper tensioning and secure anchoring to withstand wind and weather.
- Frame Erection: Begin by erecting the frame according to the manufacturer’s instructions. Ensure all frame components are properly aligned and securely fastened. This is the foundation upon which your fabric cover will be stretched. Think of this frame as the skeleton, providing the shape and support.
- Fabric Attachment: Carefully attach the fabric cover to the frame, ensuring even tension across the entire surface. Avoid wrinkles or loose areas that could weaken the structure. Imagine this step as carefully draping a sheet, ensuring it’s smooth and taut across the whole area.
- Tension Adjustment: Once the fabric is attached, adjust the tension using the provided straps or mechanisms. Ensure the fabric is taut but not overly stretched, which could damage it. Visualize this as fine-tuning the tension to achieve a perfect balance between tautness and avoiding over-stretching.
- Anchoring: Securely anchor the carport to the ground using stakes or weights, as recommended by the manufacturer. This will prevent the carport from blowing away in windy conditions. Think of this step as securing the entire structure, grounding it to the earth.
Necessary Permits and Regulations
Source: ourdownsizedlife.com
Moving a carport, even a small one, often requires navigating local regulations and obtaining the necessary permits. Failing to do so can lead to fines, delays, and even the forced removal of your carport. Understanding these requirements upfront saves time, money, and potential headaches.
Before you even begin dismantling your carport, it’s crucial to contact your local building department or planning office. These offices are the primary source of information regarding zoning laws, building codes, and permit requirements specific to your area. The requirements can vary significantly depending on factors like the carport’s size, materials, location on your property (distance from property lines, easements, etc.), and whether it’s considered a permanent or temporary structure.
Permit Application Process
The process for obtaining a permit typically involves completing an application form, providing detailed plans or drawings of your carport (including dimensions, materials, and foundation details), and potentially paying a fee. Some localities may require site inspections before, during, and after the relocation. The application form will request information about the property owner, the carport’s specifications, and the proposed relocation site. Supporting documentation might include proof of property ownership (deed or tax assessment), site survey, and contractor’s license (if applicable). It’s essential to accurately complete all sections of the application to avoid delays or rejection. Contacting the building department beforehand to inquire about specific requirements and necessary forms can streamline the process.
Potential Legal Implications of Unpermitted Carport Relocation
Moving a carport without the required permits can result in several legal repercussions. Your local authorities might issue a stop-work order, requiring you to halt the relocation until the necessary permits are obtained. Substantial fines are common, and the amount can vary based on the severity of the violation and local ordinances. In some cases, you may be ordered to remove the carport entirely, incurring significant costs for demolition and disposal. Furthermore, if the improperly relocated carport causes damage to neighboring properties or violates building codes, you could face lawsuits and be held liable for any resulting damages. The legal implications can be costly and time-consuming, emphasizing the importance of securing the necessary permits before starting the project.
Cost Estimation

Source: jasakanopijogja.com
Moving a carport is a multifaceted project with costs varying widely depending on size, materials, distance, and local regulations. Accurately estimating the total expense requires careful consideration of several factors. A thorough breakdown will help you budget effectively and avoid unexpected financial burdens.
Cost Breakdown
The overall cost of moving a carport can be broken down into several key areas. This table provides a sample estimate; your actual costs may differ based on your specific circumstances. Remember to obtain multiple quotes for labor and transportation to ensure you’re getting competitive pricing.
| Cost Item | Estimated Cost | Notes | Potential Savings |
|---|---|---|---|
| Disassembly Labor | $300 – $800 | Depends on the carport’s size and complexity. More intricate designs will cost more. | DIY disassembly can significantly reduce this cost, but requires time and expertise. |
| Transportation | $500 – $2000 | Varies significantly based on distance, size of carport, and type of transport (truck, trailer). Longer distances and larger carports increase costs. | Using a smaller, more fuel-efficient truck or trailer can save money on fuel and rental costs. |
| Reassembly Labor | $300 – $800 | Similar to disassembly, this depends on size and complexity. May be slightly less if using pre-numbered parts. | DIY reassembly can significantly reduce this cost, but requires time and expertise. |
| Permits and Fees | $100 – $500 | Costs vary widely by location and regulations. Check with your local authorities for specific requirements. | Thorough research and preparation can help avoid permit-related delays and additional costs. |
| Materials (Replacement Parts) | $100 – $500 | May be needed to replace damaged or missing parts during disassembly and reassembly. | Careful handling during disassembly can minimize the need for replacement parts. |
| Unexpected Costs | $100 – $300 (buffer) | Always include a buffer for unforeseen expenses like repairs, additional labor, or material shortages. | Careful planning and thorough inspections can help minimize unexpected costs. |
| Total Estimated Cost | $1300 – $4900 | This is a broad range; actual costs will depend on your specific project. | Careful planning and DIY work can result in significant cost savings. |
Factors Affecting Cost
Several factors significantly influence the final cost. For example, a larger, more complex carport will require more labor and transportation costs. The distance the carport needs to be moved also directly impacts transportation expenses. The condition of the carport itself will determine the need for repairs or replacement parts. Finally, local regulations and permit fees vary widely geographically. A carport in need of extensive repairs before moving will add substantially to the overall cost.
Safety Considerations Throughout the Process
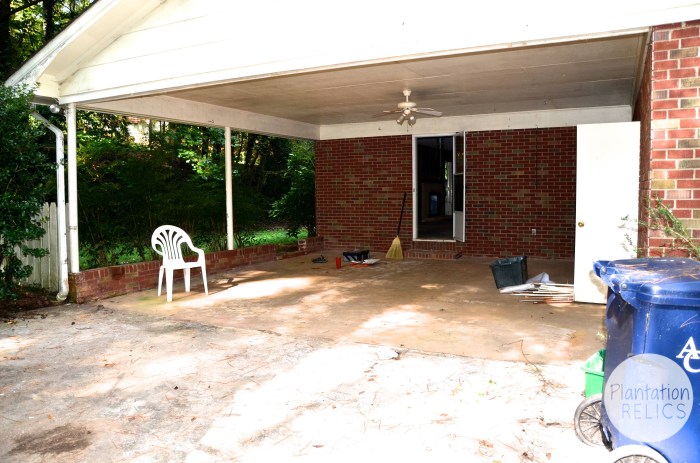
Source: plantationrelics.com
Moving a carport is a complex undertaking that involves several potentially hazardous steps. Prioritizing safety throughout the disassembly, transportation, and reassembly phases is crucial to prevent injuries and property damage. Careful planning, the use of appropriate safety equipment, and adherence to safe work practices are essential for a successful and accident-free move.
Hazards During Disassembly
Disassembling a carport involves working at heights, handling heavy materials, and using potentially dangerous tools. Improper techniques can lead to falls, cuts, crushing injuries, or damage to the carport structure itself. For example, if supporting beams are removed prematurely, the roof structure could collapse, causing serious injury.
Safety Precautions During Disassembly
Before beginning disassembly, ensure the carport is properly stabilized. Use appropriate lifting equipment, such as come-along or chain hoists, for heavy components. Always have a spotter to assist with lifting and maneuvering heavy parts. Wear appropriate PPE, including safety glasses, gloves, and sturdy work boots. Mark and label all disassembled components to facilitate reassembly. Work in a well-lit area and ensure the work area is free from obstructions. Take frequent breaks to avoid fatigue, a major contributor to accidents.
Hazards During Transportation
Transporting a disassembled carport presents risks associated with securing the load properly, maneuvering the vehicle, and potential road hazards. Improperly secured loads can shift during transport, causing damage to the carport or the vehicle, and potentially leading to accidents. Driving conditions and traffic also contribute to potential risks. For example, a sudden stop could cause unsecured components to shift, potentially causing damage or injury.
Safety Precautions During Transportation
Secure the load meticulously using appropriate straps, chains, or other securing devices. Ensure the load is evenly distributed to maintain balance and stability. Use a vehicle appropriate for the size and weight of the load. Drive cautiously and at a reduced speed, especially when navigating turns or uneven roads. Check your load frequently during transport to ensure everything remains secure. If transporting long components, ensure they are well secured and do not protrude excessively, posing a risk to other vehicles or pedestrians.
Hazards During Reassembly
Reassembly involves the same potential hazards as disassembly: working at heights, handling heavy materials, and using power tools. Misalignment of components or improper fastening can lead to structural instability and potential collapse. For instance, if bolts are not tightened sufficiently, the structure could become unstable and collapse during a storm.
Safety Precautions During Reassembly
Follow the original assembly instructions carefully. Use appropriate lifting equipment and have a spotter assist with lifting and placing heavy components. Ensure all components are properly aligned and secured before moving to the next step. Use the correct fasteners and tighten them securely. Inspect the completed structure for any signs of instability or damage. Regularly check the stability of the structure during and after assembly.
Personal Protective Equipment (PPE)
Appropriate PPE is essential throughout the entire moving process. This includes but is not limited to: safety glasses to protect against flying debris; work gloves to protect hands from cuts and scrapes; sturdy work boots with steel toes to protect feet from falling objects; a hard hat to protect the head from falling objects; hearing protection when using power tools; and high-visibility clothing to increase visibility in traffic situations if working near roads. Remember, using appropriate PPE is not optional; it’s crucial for your safety.
Ending Remarks

Source: jasaarsitekjakarta.com
Moving a carport successfully involves careful planning, the right tools, and a methodical approach. By following the steps AArtikelin in this guide, you can confidently relocate your carport, saving money compared to hiring professionals. Remember, safety is paramount throughout the entire process. So take your time, double-check your work, and enjoy the satisfaction of completing this DIY project. Your newly relocated carport will be a testament to your hard work and resourcefulness!